

UAT- Approve or Reject Change
UAT- Approve or Reject Change – Learn steps to effectively approve or reject ServiceNow change requests with step-by-step instructions. To verify that a ServiceNow change request can be approved or rejected in the UAT environment.
UAT- Approve or Reject Change Test Preconditions:
- Ensure access to the ServiceNow UAT environment with valid login credentials.
- Confirm the existence of a ServiceNow change request with the status “Pending Approval”.
If No ServiceNow change request exists for approval, create 2 change requests, one that will be used to approve, the other to be used to reject using the following steps:
To create a ServiceNow Change Request in awaiting approval, follow these steps:
- Log in to your ServiceNow account with appropriate permissions.
- Navigate to the Change Management application.
- From the navigation menu, go to Change Management > Create New.
- Fill in the necessary information for the change request, including the description, reason for the change, and any other relevant details.
- Specify the desired start and end dates for the change.
- Select the appropriate priority level for the change request.
- Assign the change request to the relevant change manager or approver.
- Save the change request.
- The change request will now be in the “Awaiting Approval” state, and the assigned change manager or approver will be notified.
Test Steps to UAT- Approve or Reject Change
- Log in to the ServiceNow UAT environment using valid login credentials. (You must be a designated approver to perform this part of the test)
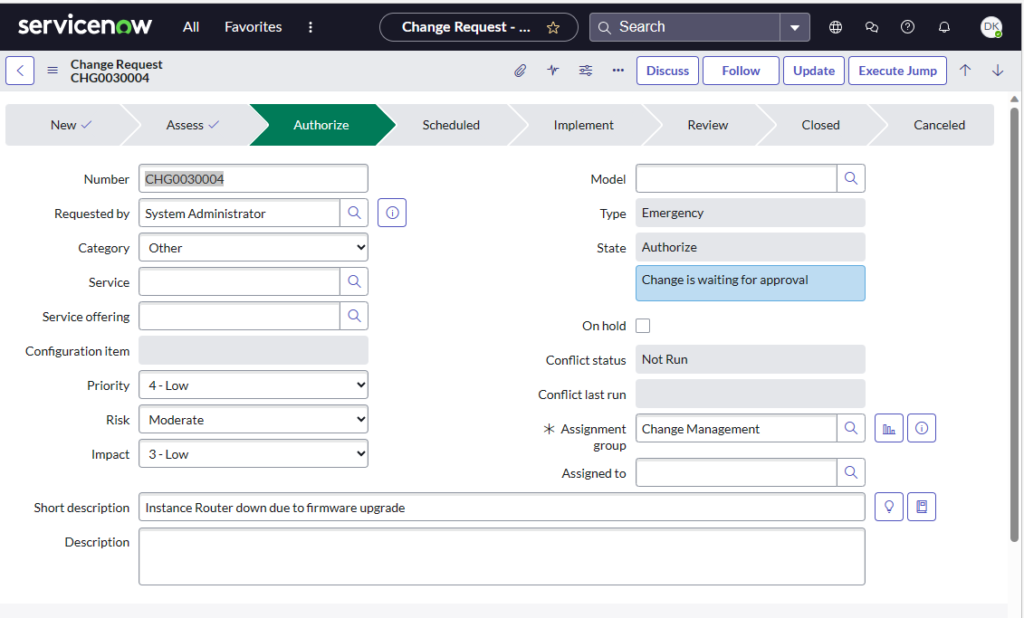
- Navigate to the Change Management module and open the list of “Change Requests”.
- Locate the specific change request that requires approval or rejection.
- Click on the change request to open it for review.
- Review the details of the change request thoroughly, ensuring its completeness and accuracy.
- If the change request is found to be incomplete or inaccurate, reject the request. Click the “Reject” button, provide a reason for rejection in the “Comments” section, and click “Submit” to save the changes.
- If the change request is complete and accurate, proceed to approve it. Click the “Approve” button, enter any necessary comments or notes, and click “Submit” to save the changes.
- Verify that the status of the change request has been appropriately updated to either “Approved” or “Rejected”.
- In the case of rejection, verify that the reason for rejection is accurately recorded in the “Comments” section.
- In the case of approval, ensure that the implementation of the change will be executed as planned.
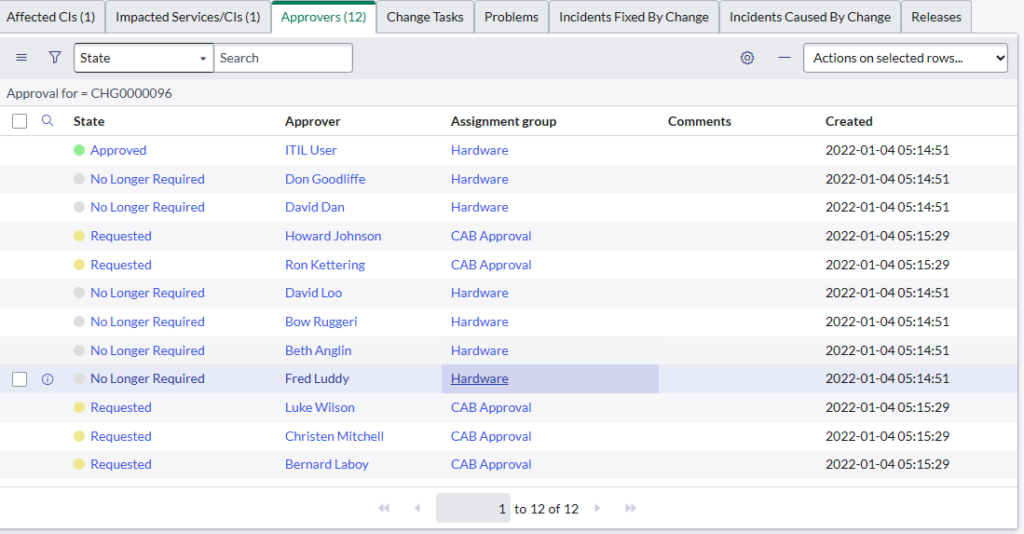
- When a change request has multiple approvals, you will see the Approved and pending approvals in the approval tab at the bottom of the Change Request. In this example, the ITIL user has proved, but CAB Approval is pending.
Postconditions:
The change request is either approved or rejected, and the corresponding status is reflected in the ServiceNow UAT environment.
Notes:
Prioritize a thorough review of the change request before approving or rejecting it to mitigate any potential unintended consequences.
Identify and address any additional steps or resources required for the change implementation before approving the request.
